Thursday, August 30, 2012

Still Alive.. and Sharpening!

For those of you who are interested, I managed to make it through the rest of this week with no other injuries! Phew!

This week has gone so well. Like, unbelievably well. Of course, students are testing the behavior waters, but my friend & I have already hit our stride with team teaching. We are so confidant and totally up for the challenge that we've been given this year! Excited to see where the rest of the year takes us.

So, the day we came back as a staff, we found out that our school switched from Reading Counts to AR. I know what AR is and everything, but does anyone have any secrets or tricks that I should know about? I'd love to know these things up front instead of learning the hard way, if at all possible! =)

Can't wait to get back into the swing of things and post about what we've been up to. Hopefully, I'll remember my camera. If not, you'll get some lovely cellphone pictures!

In other news, this came into my life last week...


Let me start out by saying, pencil sharpeners [of all varieties] are the bane of my existence. I went through three electric ones last year. The boys shoved who knows what into them, and they were never treated gently. And the handheld, personal ones? Don't get me started. They mysterious fell out of desks 12 times a day, and those same boys decided to try to sharpen their mini carrots. Yeah, that happened. So I banned those.

See? I hate pencil sharpeners. When I saw this product from Classroom Friendly Supplies floating around blog land, I knew I had to give it a shot. The worst that could happen would be another deceased or banned pencil sharpener.

Here's my honest assessment.

I opened the box, and it was already put together. I just had to attach it to a surface. I ended up just leaving it free though so it can travel with me around the room. At the moment, it has only been used by teachers!

Now, it does make noise, but it only makes about a tenth of the noise an electric sharpener does. Awesome! I don't let students sharpen pencils during instruction anyway [they trade their dull one for a sharp one], but it will definitely help to cut down on noise during morning work when they are allowed to sharpen.

This puppy is fast! I was really surprised how quick it sharpened a new pencil. I feel like an electric sharpener takes forever now! Less wasted time. Love it. And don't get me started with the perfect point. It sharpens a pencil to PERFECTION! It drives me nuts when my electric sharpener makes a point that you can't write with. Ya with me? With this sharpener, you get a perfect point every time.

The verdict? I'm sold. Totally worth it. And, like I've heard others say, I love that it is made for classrooms by a classroom teacher.

I'm going to introduce it to the kids next week, now that we are getting settled in. I will have to show them, step by step, how to use it. I might even show the video from the website. I'm sure that it'll survive. I'm hoping it'll last the whole school year! Here's the button to Troy's site if you're interested in learning more. I suggest at least checking it out!

Monday, August 27, 2012

First Day Battle Wounds

I have battle wounds!

I wish I had the energy to post about my first day back with my kids.

I really do.

But right now, all I've got for you is the fact that is looks like I've been beaten up. Hot mess status at the end of the day, people!

Here's the run down.

HUGE paper/cardboard cut on my finger. No clue how it got there.

Toe nail issue. One of my chick-a-dees came charging up to me at recess and kicked my foot in an awkward way. Ouch.

WAAY Frizzy hair. Because I'm team teaching, I have a "duty" in the morning. This week, I'm lucky enough to I have outside morning duty. It was so muggy! We also changed dismissal, so we have to wait outside with our kids until they get picked up. I looked disgusting by 3:40!

And my cute nail polish has mysteriously chipped off of one finger. Wah.

So hopefully, I can stay in one piece the rest of the week, and I'll post something of substance over my four day weekend!

How was your first day of school?

Thursday, August 16, 2012

Giveaway Winners

Went into my classroom today. We got SO much done! I didn't take pictures though.

Shocker.

But I plan on getting pictures when it is all done! My friend & I are so excited to be teaching together. We've had to make a few decisions about some procedures that we do differently, but we are both pretty flexible. We go back officially on Monday! Yikes.

On a side note, it was SO hard to wake up early today. Ugh.

Here are the winners of my giveaway!


I am emailing you now to confirm your email addresses. Once I hear back from you, you'll receive your prizes from me & I will pass along your email addresses to the ladies who helped in my giveaway!

Congratulations, and thank you to everyone who entered! I will be posting more freebies in the near future as a thank you to ALL of my followers!


Tuesday, August 14, 2012

Subject Poster Freebie

I wanted to let you know that I uploaded a new freebie to my TPT store! 

I'm toying around with ways that I'd like to display my essential questions in my classroom. Last year, I dedicated a whole bulletin board to them. I would write the EQs on sentence strips and change them out by stapling them. It was in the front of the classroom, and the sentence strips were large, so they were easily viewed by everyone. 

This year, I'm not sure I want to use that bulletin board for that purpose. So I'm trying to think of ways to display this mandatory element in my classroom so that everyone can see it, and also in a way that is easy to maintain.

I made these pages as an option. I was thinking I could maybe enlarge them a bit and laminate so I can erase/rewrite?

[What I reaaaaally wanted to do was get them made on Vistaprint as large car magnets, but that would be a little waaay more than I want to spend. Especially since I've spent so much already!]

So anyway, click the image to see and download the freebie! The PDF includes a sign for Reading, Writing, Math, Science, and Social Studies. If you need something else, shoot me and email, and I'll whip it up for ya!


How do you display essential questions/standards/objectives so that they are easily seen and maintained?


/////////Reminder that my giveaway will end tomorrow at midnight! If I have 250 followers by then [only need 7 more], I will pick a third winner from the comments! Please spread the word if you have a second!/////////

Also-- I'm currently watching E! Investigates: Bullying: Celebs Speak Out. Wow, what a powerful program. If I were already a school counselor in a middle to high school setting, I would use this special as a tool.

Monday, August 13, 2012

I've Got the B2S Blues.

Hey, everyone!

One week until teachers officially report back. Yikes!

And I just heard we don't have a reading specialist anymore. 
She's been moved back into a classroom teacher position.

It's crazy. Teachers work SO hard, and every time we make progress or get ahead, something is taken away from us! The fact that teachers are expected to do more and more with less and less is baffling to me. I'm sure most of you can relate to this in some way!

Hopefully, we have a high enough unit count so that someone can be hired after Sept. 30th. Not banking on it though, as my class list is sitting steady at nineteen.

Anyway, I've been crafting and organizing a lot of the stuff I've purchased over the summer! I would post a picture, but the pile in my living room is straight up embarrassing! Teachers are allowed back in the building [unpaid] this week, so my friend & I are going to go in Thursday for the day to get a little head start. 

I wish I was ambitious enough to go in every day this week, but I'm truly not in the mood. So much nonsense going on in my life right now. I actually can't wait until school and grad classes start so that I have something to focus on.

I'll be back Thursday with the winner[s] of my giveaway and "before" pictures of the classroom!

If you haven't entered, click here and get to it! I'm at 239 followers, and I said that if I get to 250 by the time I announce the winner [Thursday night], I'd pick a third winner!

Good luck to everyone who has started back!

Thursday, August 9, 2012

200+ Giveaway!

Sorry it has taken so long to have this giveaway! I got wrapped up in my blog design tutorials and sleeping. 

Yeah, that's pretty accurate.

Teachers return in a week and a half. Students return in two weeks and a half. Don't want to talk about it!

This is my first time using Rafflecopter, so I hope it comes through for me! Let me know if anything looks off or doesn't work!

[frame/clip art-- MareeTrueLove]

I will be choosing at least TWO winners!

Winner #1 will receive:

All three of my task card sets from my TPT store!

An item from Haley at Following Optimism's TPT store!

A $10 giftcard to Target
-------------------------------------

Winner #2 will receive:

All three of my task card sets from my TPT store!


A Customizable Back to School PowerPoint from Mrs. G at Teach on a Limb!
[Description: 21 Customizable slides (+3 extras) to use at B2S Night for parents, which includes meet the teacher, classroom philosophy, daily schedule, grades, classroom rules/rewards, etc.]


A $10 giftcard to Starbucks!


I hope this serves as a small thank you to the people who have been following and commenting on my blog for the past year. It is very much appreciated! I can't wait to school is in full swing & I can post some educational stuff! Enter below! [Blogging about the giveaway/my blog isn't a requirement, but it is always appreciated!]

Notice that I said AT LEAST 2 winners. If I make it to 250 before the end of this giveaway [Thursday, right after I get my B2S hair cut!], I will choose a third winner from the comments to win a prize!

Good luck!
a Rafflecopter giveaway

Tuesday, August 7, 2012

Blog Tutorial 4: Customizing your Tabs and Gadget Titles

I'm back with what will be my second to last planned tutorial. I have this one, and then I was going to do a "finishing touches" post. That post will consist of tweaks you can make to your design in blogger and/or photobucket to make it perfect! 

My question to you is: are there any other things that you'd like a tutorial on regarding blog design? Leave a comment or shoot me an email! There are tons of tutorials if you google what you're looking for, but I'm trying to put it into teacher friendly language and use lots of pictures! =)

So, onto this tutorial: Customizing your Tabs and Gadget Titles.

First, I have to give credit to Terri from The Creative Apple! I wanted to customize the tabs on my design about a month ago, and she had just done it. I asked her how to do it, and she emailed me back right away! So thanks, Terri!

The first thing you'll have to do is head over to Gimp or Word to make your tabs! They can be images or words. Now, I only know how to do the words if you have a solid color background, because I'm not sure how to make text with a transparant background. I'm sure it's possible, though!

So, just like you did your header, you need a starter image. Hopefully, you have been looking through and downloading scrapbooking kits [making sure you follow their TOU!] recently!

[For this tutorial, I am going to use an image from Scraps by Missy. Click that link to visit her blog. She has many freebies and kits to purchase!]

Open your image in Gimp using File--> Open as Layer. Scale your layer a little smaller, but make sure that you keep the proportion so that the image stays intact! I'm going to make the width 200, but you can make it however big/small you want. Remember, though, that these will have to sit horizontally on the top of the center of your blog.


The problem now, is that there is a whole bunch of extra space around the frame. Even though it is transparent, it would still take up space. So we are going to get rid of it! Go to Image--> Zealous Crop. This crop will get rid of the extra space, and it will make sure that there is only as much transparent extra space that is needed. The image didn't center for me after that step, and it doesn't matter. It will turn out the same!


You don't have to do this step, but if you need help centering, set guides like we did with the background. Go to Image--> Guides--> New Guide by Percent. Set one vertically, and repeat to set one horizontally.


Now, you can add your text! Many bloggers have tabs on the top of their blog. The most common that I've found are Home, About Me, Freebies, Awards, Resources, and Copyright. You can make a "page" on your blog for whatever you want! For the sake of time, I'll just be making three tabs.

Just as we added text before, click the A in your toolbar and click your image. Type in your page title. I'll start with Home! Remember you can change the font, color, size, spacing, etc! Move your text to the center of your tab by clicking the move button in the toolbar.


You are finished making your first tab! We are ready to make another, but we aren't going to start from scratch! We are going to duplicate what we already have.

You are going to duplicate the WHOLE thing, not just the layer. So go to Image-->Duplicate. A new window will pop up that looks identical to the one that you have just finished! 

[Don't close the first one, we didn't save it yet! Just minimize it.]


Once you have a duplicated image, you only have to customize the text! I'm going to use the same font, a slightly smaller size, and the same color. When you go to change the color, the color that you used in the first tab should be saved. Easy-peasy!


Duplicate and repeat as many times as you'd like, depending on how many tabs you need! I'm going to make three-- home, about me, and resources.

You are ready to save! Just like we did the button, you are going to save each one as an .xcf [in case you'd like to go back in and fix] and export it as a .png [so that we can upload to photobucket and install]. I would name them TAB_home, TAB_about, TAB_resources, etc., just so they are easy to find!

Once they are saved, upload them in photobucket!


Now you'll need to go to your blogger layout. Right below your Header, you will need to add an HTML gadget in the long space. If you want, you can create it anywhere in the layout, and then drag it to that position! [If you have a Pages tab from Blogger already, you need to remove it.] Name it Pages for easy identification.


Here is where the coding comes in. In essence, you will be adding each of your tab images in the order that you want them to be. Each image will be linked to the individual page.

If you would like your tabs centers, put <center> at the beginning of the HTML gadget.

You will need the below code for each tab/image. [Thanks again, Terri!] Copy this into the gadget box as many times as you have images. Where it says YOUR PAGE URL, go to your page and paste the URL there. Where it says YOUR IMAGE URL, go to Photobucket and grab the direct URL.


<a href="
YOUR PAGE URL" mce_href="YOUR PAGE URL"><img src="YOUR IMAGE URL" mce_src="YOUR IMAGE URL" border="0" /></a>


When you're doing this, make sure you make them in the order that you want. You can easily switch them around by cutting and pasting the code. Here is what mine looks like.


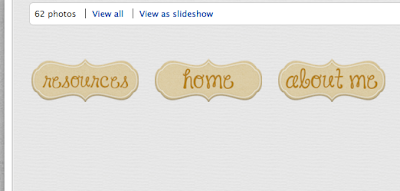
Click Save and then Preview your design. They should be in one straight line under your header. You may need to resize if they are too large. You can go back to them in Photobucket, resize them, and fix the direct link, as I've showed you in previous tutorials. Here's the finished tabs on my test blog!


-----------------------------

PHEW. That was long! Thankfully, you make your gadget titles in the exact same way using GIMP. You can use the same frame as you did in your tabs or a different one. Up to you! On my blog here, I used a slightly different one. I'm going to use the ones I already have from my actual blog.

Make them and save them in GIMP. You will want them to be pretty small, depending on the width of your side bars. I'd start with 200 or less. I would save them as title_followers, title_labels, etc so that you can easily find them later!

Now, go to blogger and add a new HTML gadget.


Title your gadget so that you know which image it will be. I'm doing the followers one, so I added that title. Then, paste the following code in the box. Where it says YOURIMAGEURL, go to Photobucket and get your direct link code. Paste it there.

<center><img src="YOURIMAGEURL"/></center>


After you save it, drag it directly above its corresponding gadget. This is why you titled it the way that you did.


Click preview, and you should see something like this. You have the new gadget title, your new image, the actual gadget title, and your followers gadget. That is a lot of titles! Even though it looks like that, leave it there for now!


Now, repeat the same exact thing for each gadget that you have! You will have a lot of gadgets on your sidebars, along with a lot of titles. That's okay! Once you're finished adding your images above each gadget, you can go back and delete ALL of the titles. This will create a smoother side bar!


Here is just the followers portion of my test blog, after I deleted the titles!


YAY! You have customized your blog! I'll be back soon with my last planned tutorial. Please comment if you find these tutorials useful! I made a little button in case you want to pin a tutorial for later use. I've also added a new tab on my blog that will have links to all my tutorials. =)



Friday, August 3, 2012

It's August?

Ugh, it is August. I go back to school the 20th, with the kids returning on the 27th. I'm not ready for summer to be over, but I am ready to get back into a routine.

Keeping this post short and sweet, since my tutorials are soooo long!

Currently Time!


Is anyone else sad that swimming and gymnastics are coming to an end in the Olympics? I love watching those! Looking forward to soccer!

I made my own scratch off tickets. It took me a few tries to get the right dish soap and paint combo. Once I make a few more batches, I'll show them off. They are pretty simple. No clip art, just frames and text.

I've had a great time being able to stay at my dad's house a lot during the summer. I really miss being this close to my family and best friends. Once school starts, I make it home about one weekend a month. And depending on schedules, it is never certain that I see my friends. Boo.

While most people my age are having baby fever, I'm having dog fever. I wrote in a post about how I am a foster mom for cats and dogs. I am really getting the urge to adopt a pup, but it really isn't in the cards right now. My commute to work is about 35 minutes, and I usually stay at least an hour after work. Now, I'll be taking a class once a week that runs from about 5:30-10. With no relatives or friends really close, no one will be able to let a pup out. Boo. So my dog mommy-ship has been put on hold. I may foster cats during the school year, though.

Most of my posts are put up around 2am, so I think my need is self explanatory. I'm not a morning person!

That's all I have for you today. Working on my next tutorial!

Blog Tutorial 3: Making a Header and Button in GIMP

Hello & Welcome! A couple things before I get started with the tutorial!

Remember, I marked down my TPT products to $1 until sometime tomorrow evening. They are geared toward grades 2 - 4, depending on your students' abilities. Click here to view my last post with a more in depth description!

I am also still looking for helpers for my giveaway. Not much interest in helping, I guess? It'll just have to be a small event, no biggie! But thanks for those of you who are willing to help. I'll contact you soon! =)

---------------------------------------

Onto the tutorial. Just a reminder, I posted previously about how to make a header and button using Word/Pages. If this seems too complicated, feel free to use that tutorial by clicking here!

First thing's first-- open up GIMP! Open up new file. It doesn't really matter what size it is right now. Mine is something like 940x400.

Now, you'll have to choose the background [or base/outline] of your header. If you downloaded a scrapbooking kit, many of them come with frames that you can use. If not, you can find frames all over the place, just be sure to check the designers terms of use. If you can't find anything, just start out by making a rectangle-type shape in the color of your choosing in paint. You can jazz it up! Whichever one that you choose, go to File-->Open as Layer and open it up!

Depending on the size of the frame, you might not be able to see it because it is too large. So go to Layer--> Scale and make it something manageable. We can change the size of it later! Remember, if you want to change the proportions [make it taller or wider, not both], you'll have to click the chain to make it broken!


Here's what we have! If you look in your layers window [if you don't have that open, go to Windows-->Layers], you'll see that we have two layers open right now. One is the white background image. If you click the eye next to that, it will disappear. Do that now.


Okay, now this gets tricky, so try to stick with me! You need a paper/background to fill in the middle of your header. Do you see how, before we hid the white background, it covered all of the transparency? We want to keep the transparency on the outside so that our header keeps it cute shape! So we are going to need to choose a paper, then resize it so that it is only seen inside the frame!

[[This is the difference, to me, between using Word or Gimp. If you're fine with a perfect rectangle header (like on my blog), Word might be a good route for you!]]

So, I'm going to choose a paper from the same kit so it matches, and open it as a layer. Then I'm going to resize it to be 800x300. Remember, I can change the size again later.


Hm, notice how the new paper is on top of the frame? Not how we want it to look! So, we are going to change the order of the layers! By changing the order, we are switching which layer is on top. We want the frame on top. Look at your layer box. Your newest layer/paper should be on top. We want to move it back, behind the frame. Highlight [click] the newest paper, and click the down arrow. Here should be the result!


Looking good so far, right?! Now, lock down these layers so that they don't move around when you're messing with embellishments by clicking the blank space next to the eye [a chain will appear]. 

Now, we're going to decorate with pictures and words. Every header has words, but you don't necessarily have to use pictures. You can skip this part if you'd like!

Just like with the background, we are going to File-->Open as Layer. Find your first embellishment/clip art. Make sure that this layer is on the top of the list. If it isn't, move it up using the UP arrow. If you'd like the resize it, go to Layer--> Scale... or click the scale button in the tool bar.

[If you need a refresher on manipulating embellishments, revisit my last tutorial!]

A few things I don't think I mentioned in my last post regarding manipulating images, deleting and rotating. If you add a layer/image, but you don't end up liking how it looks, highlight the layer in your layer toolbar. Then, click the trashcan. This will delete your image!


If you would like to rotate an image. Click the rotate button on the toolbar, then click your image. A new box will pop up, and you can use the slider to rotate the image as much as you want!


I'm going to keep my flowers straight. Don't forget, you can move your image at any time by clicking the move button in the tool bar!

Repeat adding clip art/embellishments until you are happy. I added flowers and a bird!


The last step is adding text. If you have a set of letter images/clip art, you would add them like you added the embellishments. I am going to add regular text. GIMP has all of the fonts that you have on your computer. So if you're a font hoarder like me, you'll have a lot to choose from! However, it is kind of a pain, because you can't search for them. You have to type in what you want. A good idea is to use Wordmark to choose some fonts that you might like, so be ready for that.

Click the A in your tool bar, and click somewhere within your header. Type your title. Highlight your title, and then you can change your font, size, color [sorry, I left that out of the screenshot!] and spacing using the box that pops up. Notice that the text becomes a layer in your layer box.


So I changed mine a little bit, but I'm not satisfied. IMPORTANT: You can move the text while you're working on it, but not rotate. You can only rotate it when you're finished editing your text. You can add as many text layers as you'd like.


Here's my finished product! Not the coolest, but it'll do for a tutorial!


Now, you are going to save it like you saved your background. Once as a .xcf, and then you need to export it as a PNG. PNG is sooooo important! If you want the outside to remain transparent, this step is essential!

Now, upload this image to your Photobucket account. Once you've done that, keep that open and head over the Blogger. Go to your layout and edit the header.


Copy the direct link of your image and use that to upload it into blogger. Here's what you might see.


Do you see how it is cut off on the right side? That means we need to make the header smaller. Instead of going back into GIMP, we are going to fix it in Photobucket. SO much easier! So head back over to Photobucket, and click edit. Once you've clicked edit, go to the bottom and switch to advanced editor.


Now, you can change your image size. This will depend on the width of your blog and your personal preference, but I changed mine to 860 x 350. Then, you will save it again. Make sure it is a PNG so that you can keep your pretty edges! You may need to do this a few times to get your header exactly the size that you want it!


Upload this new, updated header onto your layout. And you're finished!


Phew! That was a lot of work. But it is SO worth it when you look at your pretty blog, and it is something that you are proud of making on your own!

This post was also supposed to be about making a button.

Here's the thing! You make a button in the same exact way, but it is obviously just wayyy smaller! In GIMP, start out with an image that is about 200 x 200 and go from there! [[Or, you can make it in Word if you want it to be a simple square/rectangle, like most buttons are. Here's that link again!]]

And I have to outsource when it comes to coding again, because I still can't get it to show up. But here is a great website that tells you how to upload your button with a grab box!

I hope these tutorials continue to help you. Not getting much feedback, but thanks to those who have commented! It is very much appreciated!

My next tutorial will be Blog Tutorial 4: Customizing your Tabs and Gadget Titles.